Storage providers 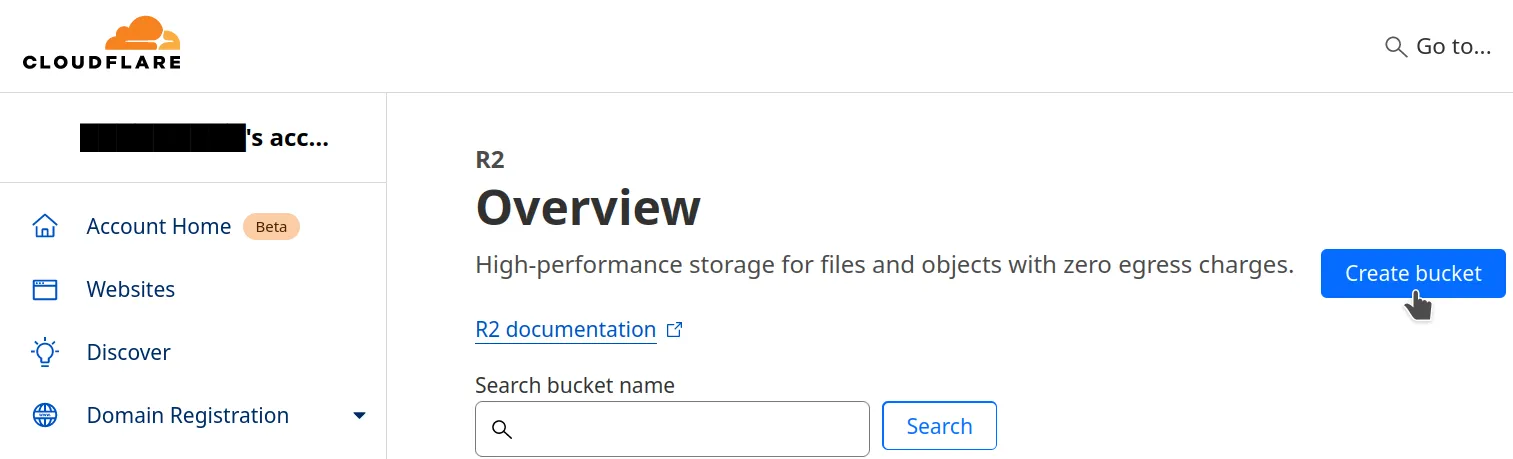 Give your bucket a unique name, optionally select a region, leave the storage
class to the default, and create the bucket.
Give your bucket a unique name, optionally select a region, leave the storage
class to the default, and create the bucket.
In your bucket's page, you can drag-and-drop your data directly from the browser into the bucket (or click the "upload" button).
Attempting to upload too many files this way can freeze or crash your browser. To avoid that, consider using one of the other methods described in the dataset section. To upload (and delete) items using these, your keys will need write permissions.
You can find the bucket's endpoint URL under the Settings tab, labeled as "S3 API". Be careful, you should remove the last part of the URL (which is the bucket's name), after the ".com".
 Give your new token a unique name and the desired policy ("Object Read & Write"
or "Object Read only" are sufficient for Sihl AI - you might want to use the
"admin" permissions for other purposes).
Give your new token a unique name and the desired policy ("Object Read & Write"
or "Object Read only" are sufficient for Sihl AI - you might want to use the
"admin" permissions for other purposes).
For security reasons, we recommend applying each token to a single bucket.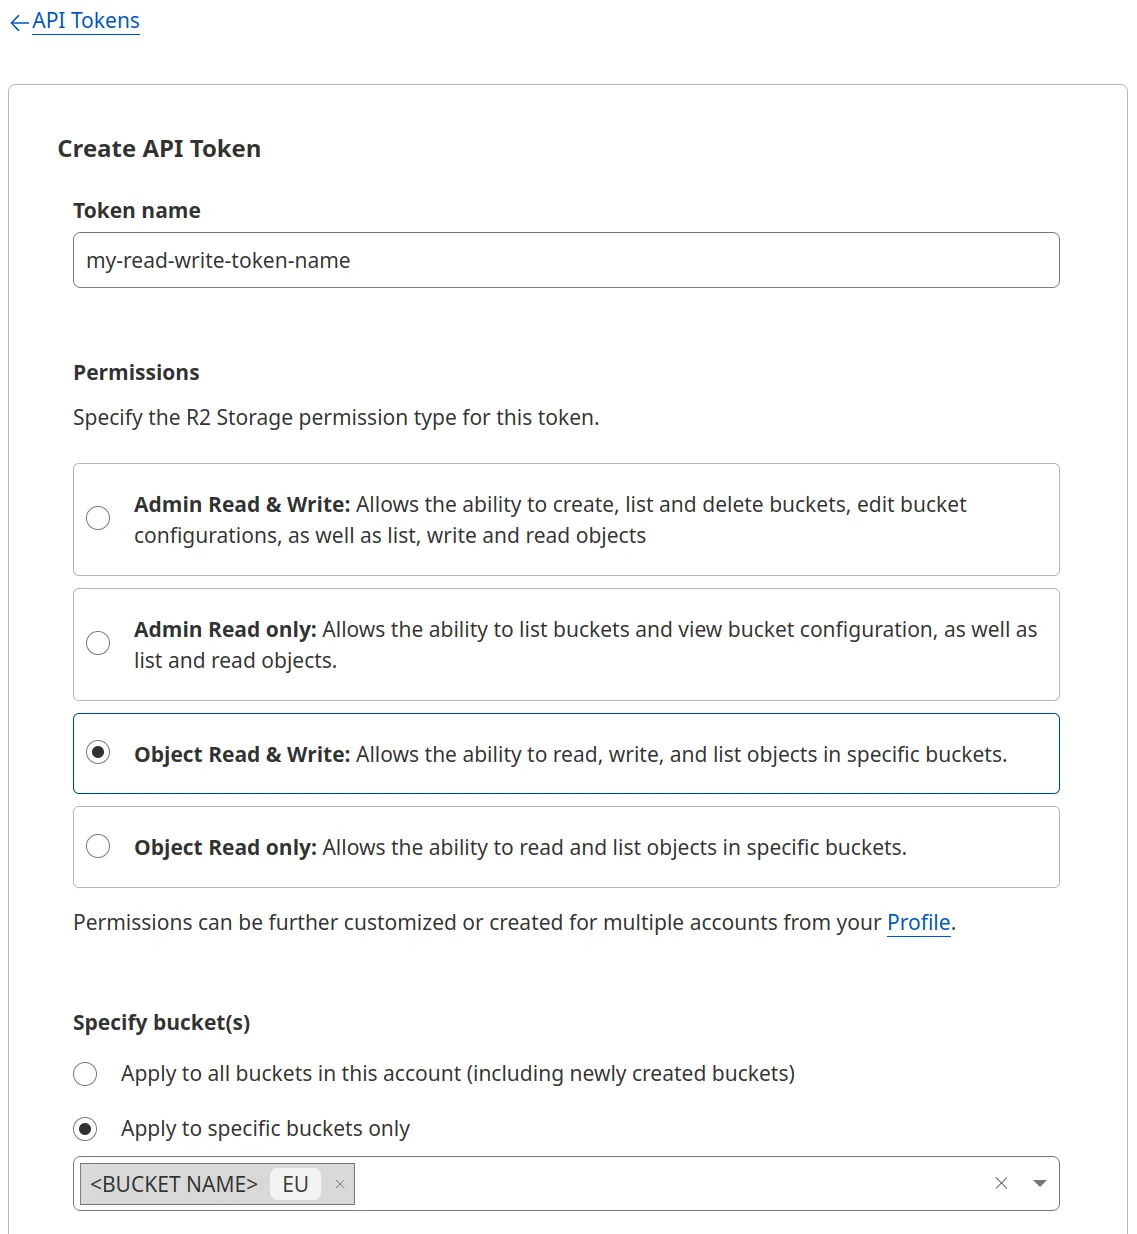 Once created, you will be shown the access key ("Access key ID") and secret key
("Secret Access Key") , as well as the and endpoint URL.
Once created, you will be shown the access key ("Access key ID") and secret key
("Secret Access Key") , as well as the and endpoint URL.
Write these keys down somewhere (or even better, save them in a password manager) - as the warning says, the secret key will never be shown again once you leave this page!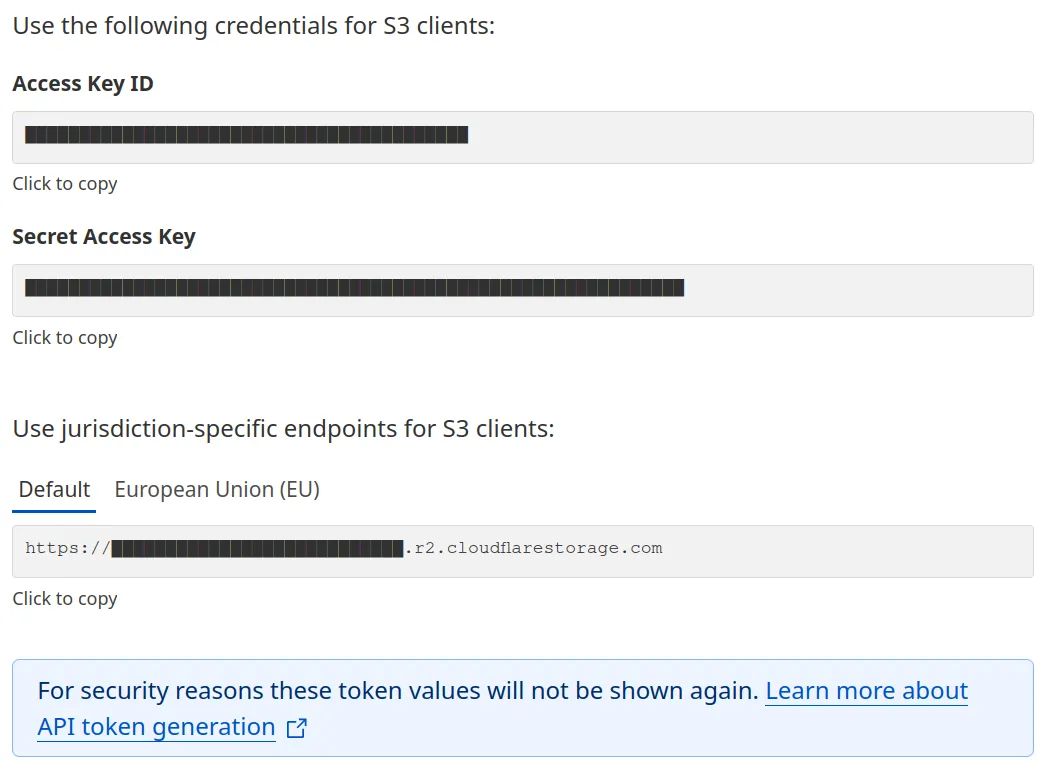
Cloudflare R2
homepageCreate a bucket
Go to the R2 service (in the navigation bar on the left) and create a new bucket by clicking on the blue button on the right.
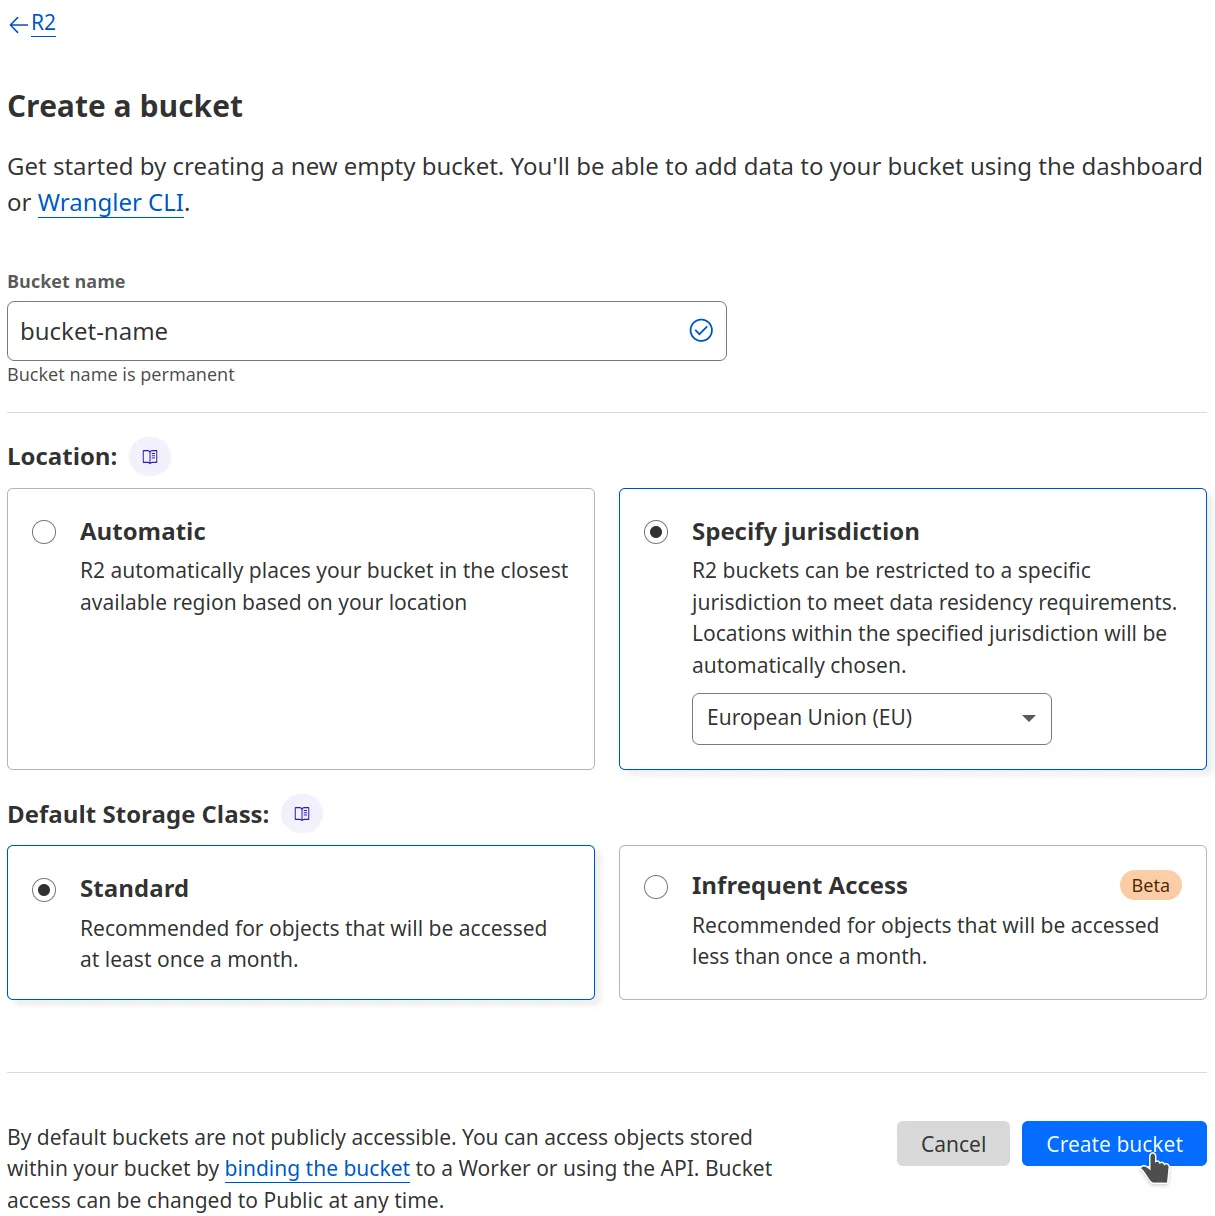
Give your bucket a unique name, optionally select a region, leave the storage
class to the default, and create the bucket.
In your bucket's page, you can drag-and-drop your data directly from the browser into the bucket (or click the "upload" button).
Attempting to upload too many files this way can freeze or crash your browser. To avoid that, consider using one of the other methods described in the dataset section. To upload (and delete) items using these, your keys will need write permissions.
You can find the bucket's endpoint URL under the Settings tab, labeled as "S3 API". Be careful, you should remove the last part of the URL (which is the bucket's name), after the ".com".
Generate credentials
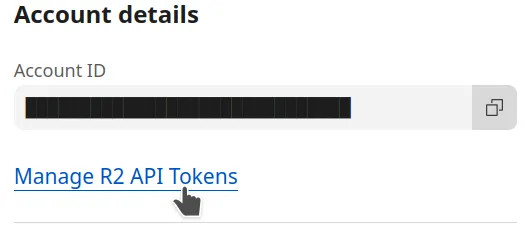
Back in the R2 page, on the right-hand side, click on the "Manage R2 API tokens" link, then click on the button to create a new token.
Give your new token a unique name and the desired policy ("Object Read & Write"
or "Object Read only" are sufficient for Sihl AI - you might want to use the
"admin" permissions for other purposes).For security reasons, we recommend applying each token to a single bucket.
Once created, you will be shown the access key ("Access key ID") and secret key
("Secret Access Key") , as well as the and endpoint URL. Write these keys down somewhere (or even better, save them in a password manager) - as the warning says, the secret key will never be shown again once you leave this page!